esim Germany, Spain, France, Greece, Italy, Europe, Dubai, Egypt, Cyprus, Olympics
esim roaming
iTRAVEL eSIM Setup Guide
Easier Than Booking A Ticket
How To Setup Your eSIM On iOS
Ensure that the QR code is saved to your photos.
On your device, go to Settings.
Go to Mobile Service or Cellular Service.
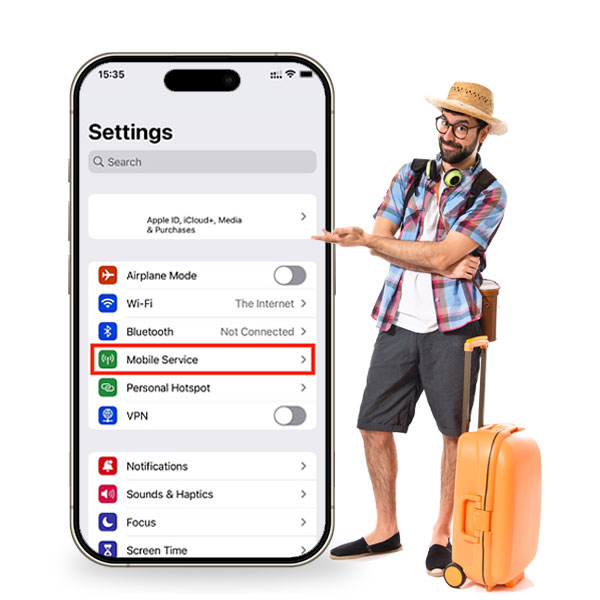
Tap Add eSIM.
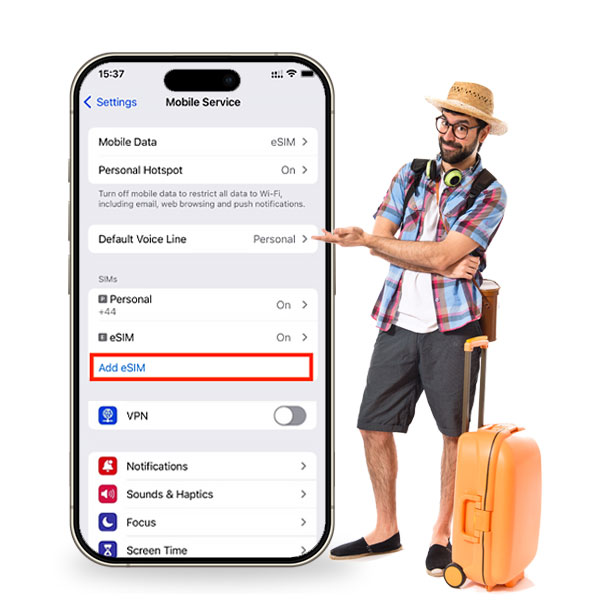
Tap Use QR Code.
Tap Open Photos.
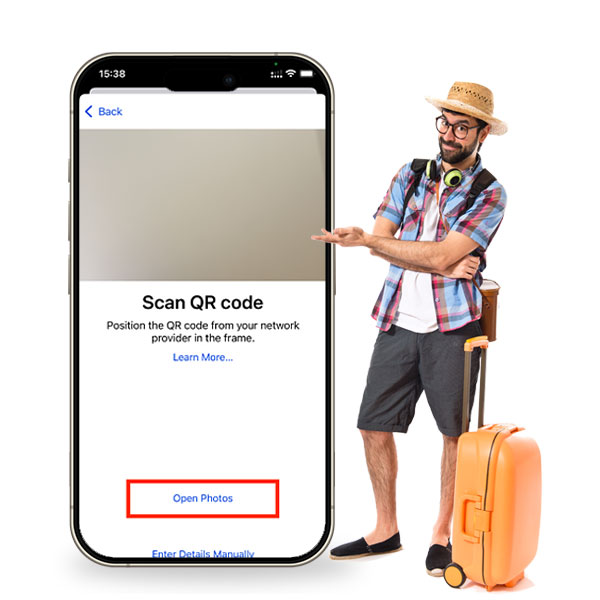
Select the QR code that you saved previously.
Tap Continue.
Note: Do NOT close this window else the installation may fail.
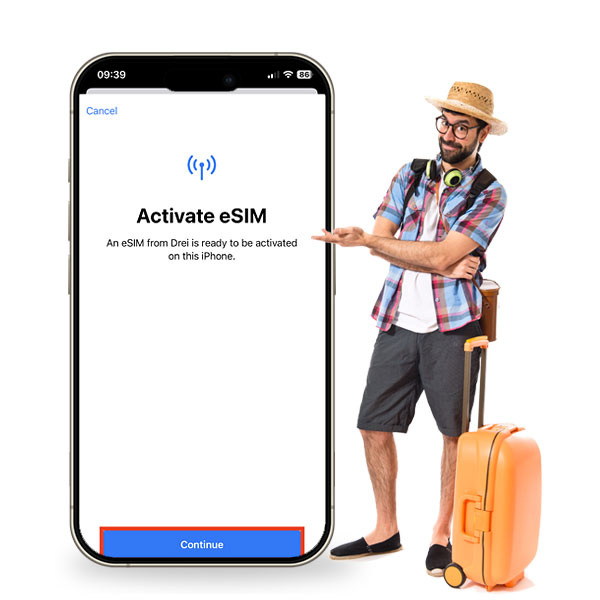
Please allow up to 10 minutes for the eSIM to activate.
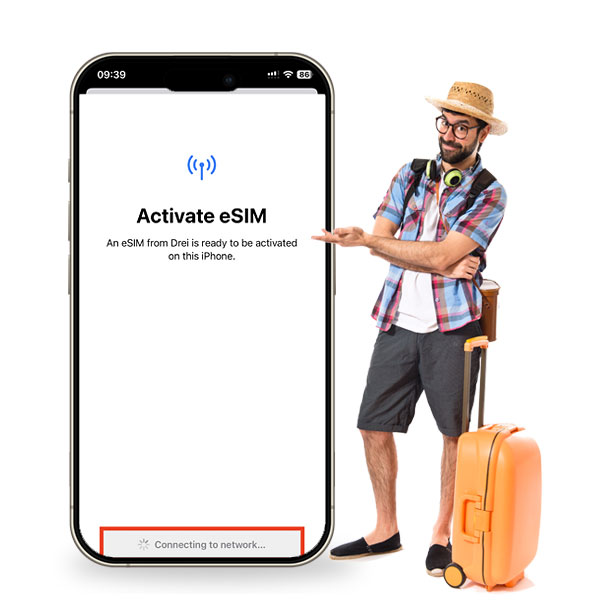
Tap Done to complete the installation.
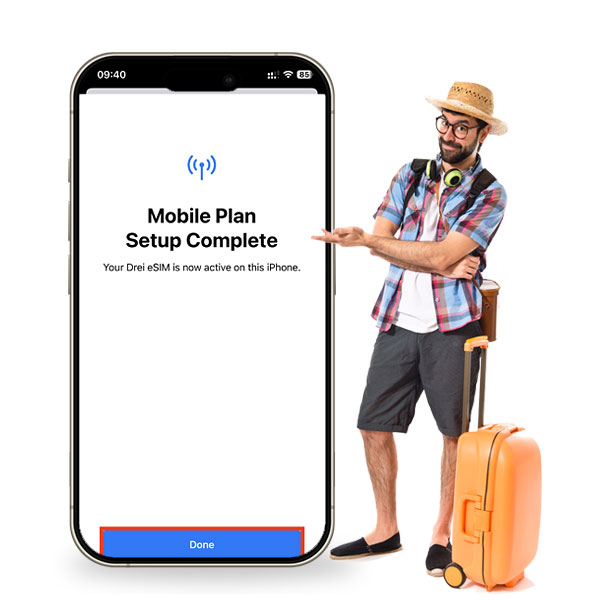
Configure the following settings suggested below. Set Default Line to Primary
Tap Continue.
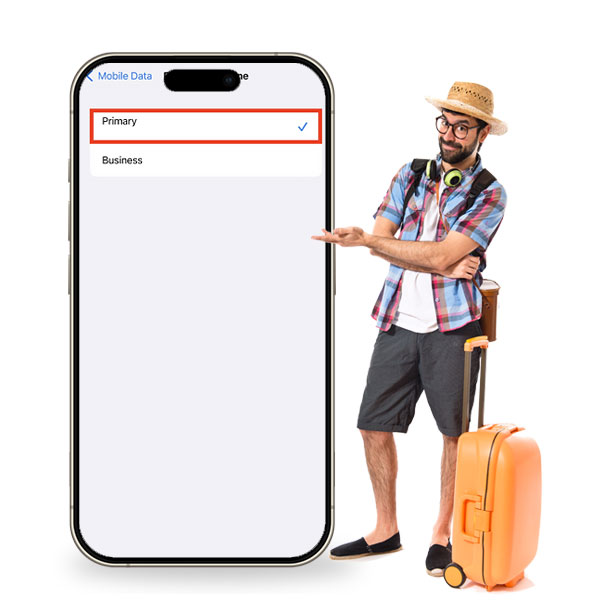
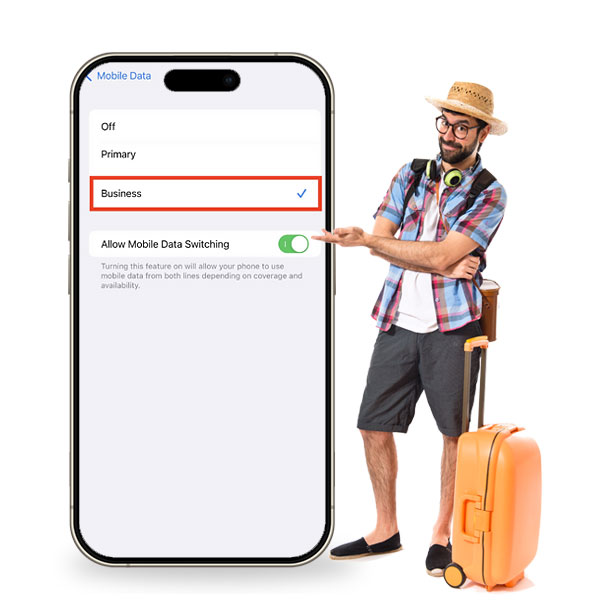
Set Mobile Data to your chosen eSIM. As in the example below Business.
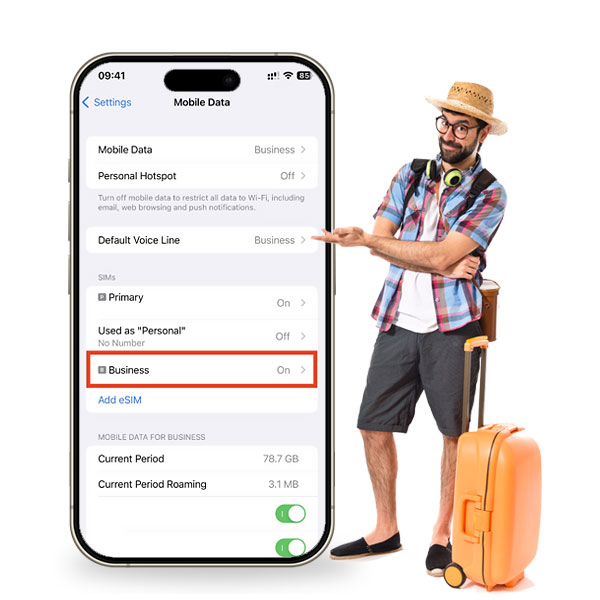
Go back into Settings
Tap Mobile Service or Cellular Service. Tap on the eSIM you want to check Data Roaming.
Toggle the switch to On.
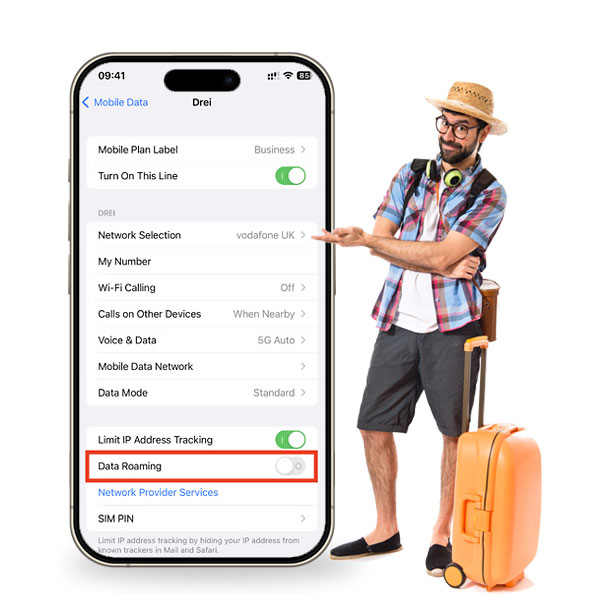
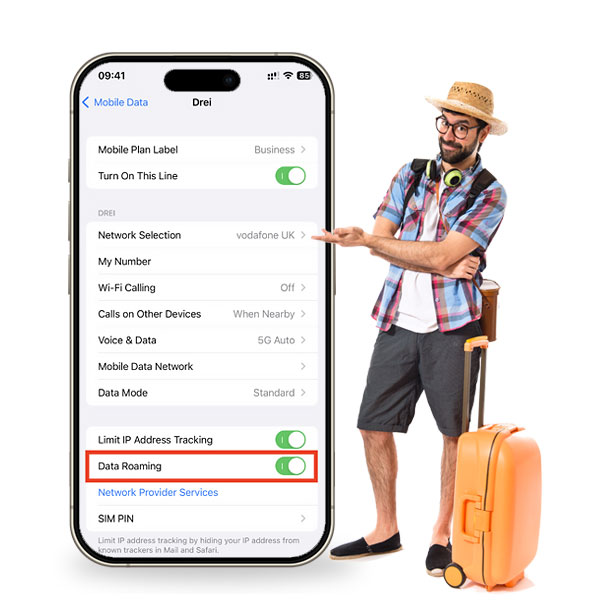
The Data Roaming toggle should appear as below on the installed eSIM.
How To Setup Your eSIM On Android
Open camera
Scan QR
Tap "Add plan to phone".
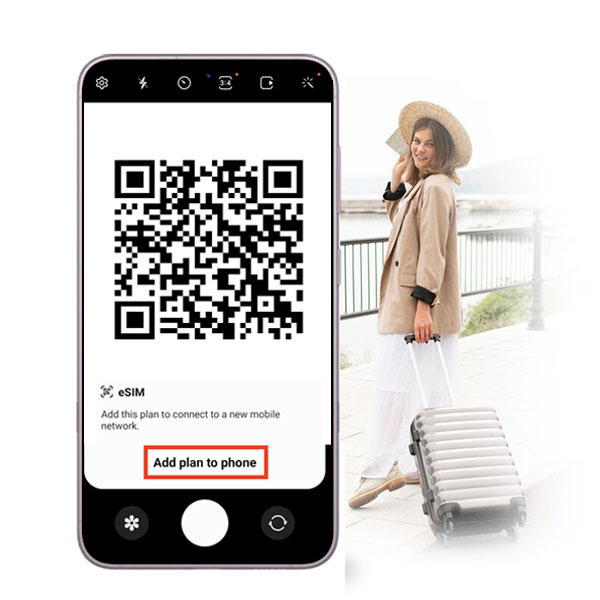
OR
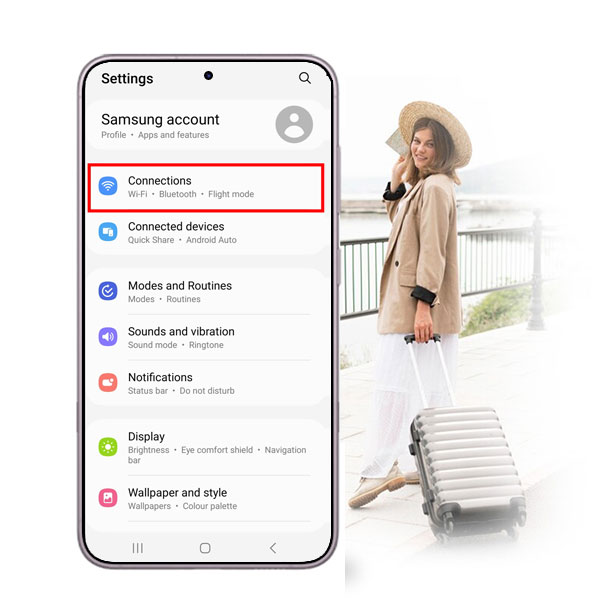
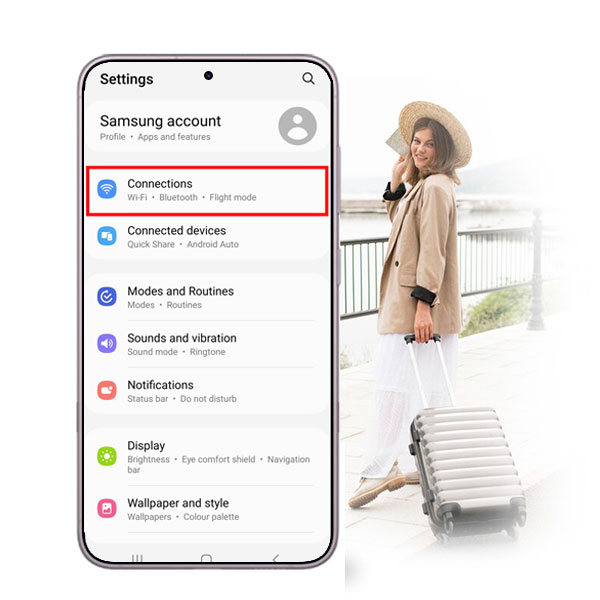
Go to Settings
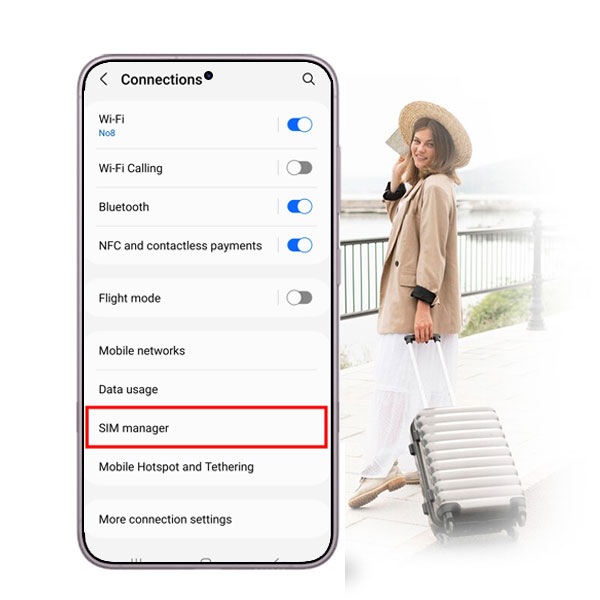
Connections.
SIM manager.
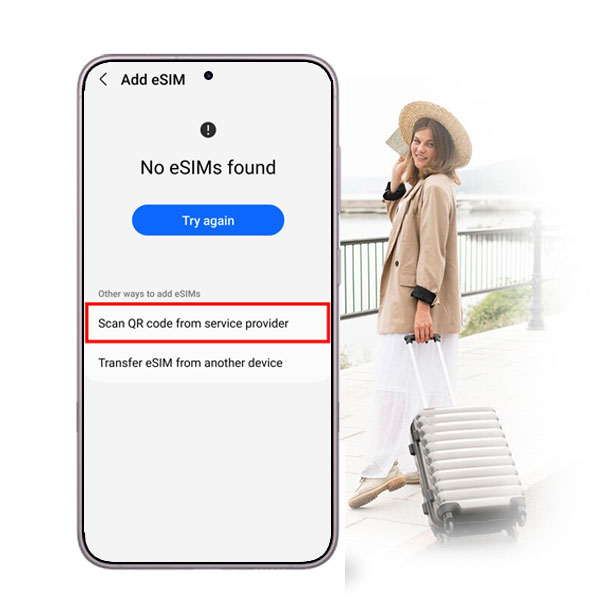
Add eSIM.
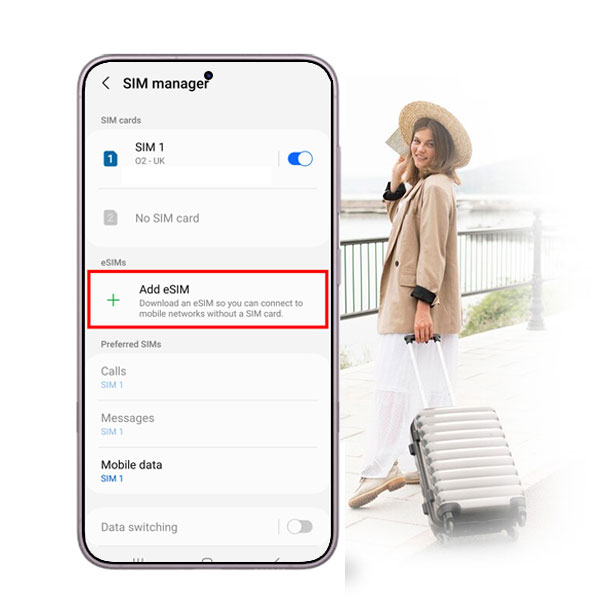
Then tap "Scan QR code from service provider".
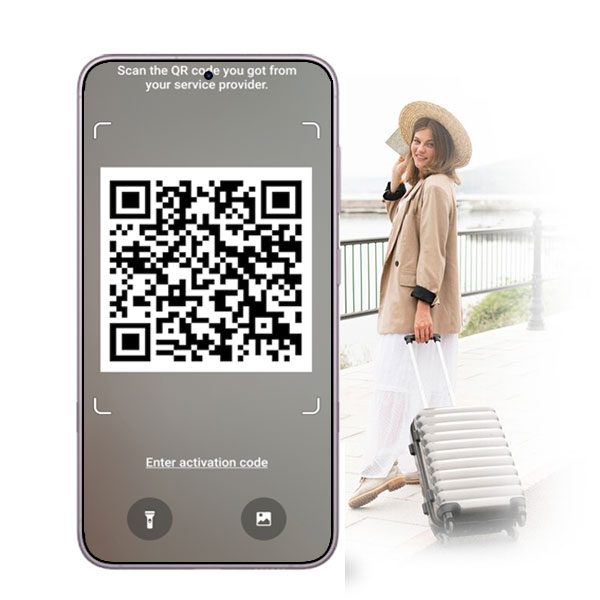
Now scan the QR code provided.
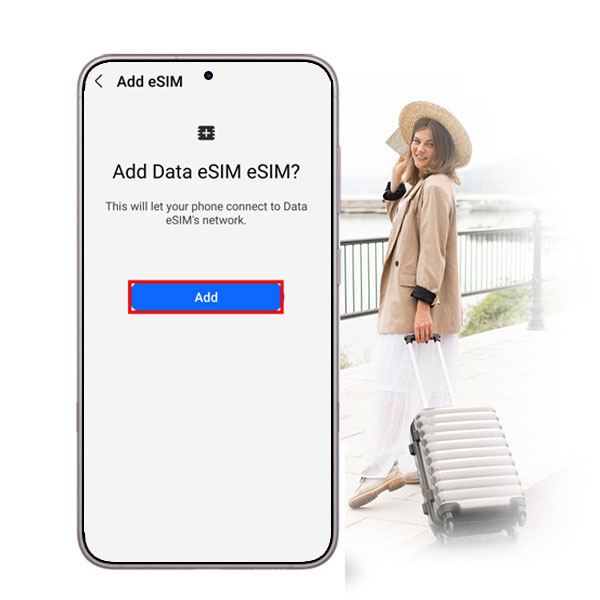
When prompted, tap "Add".
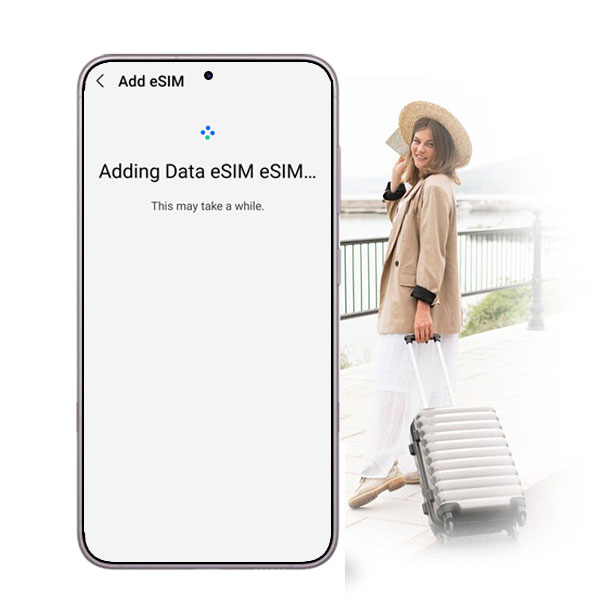
Allow up to 10 minutes for the eSIM to activate.
Tap "Done".
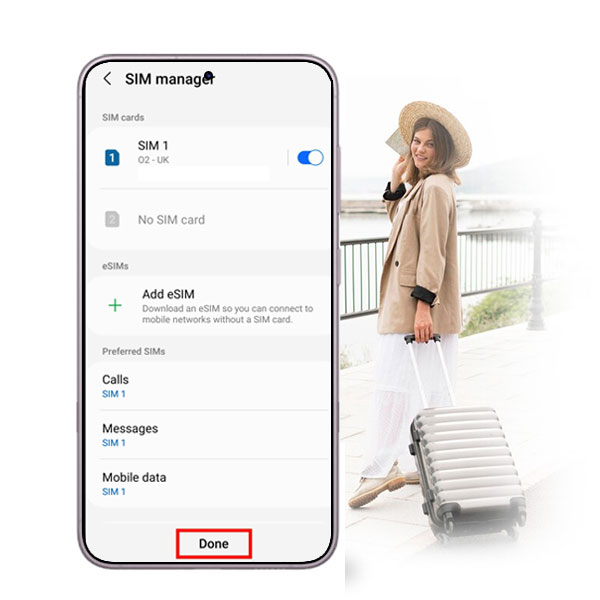
Now configure your SIM / eSIM settings correctly.
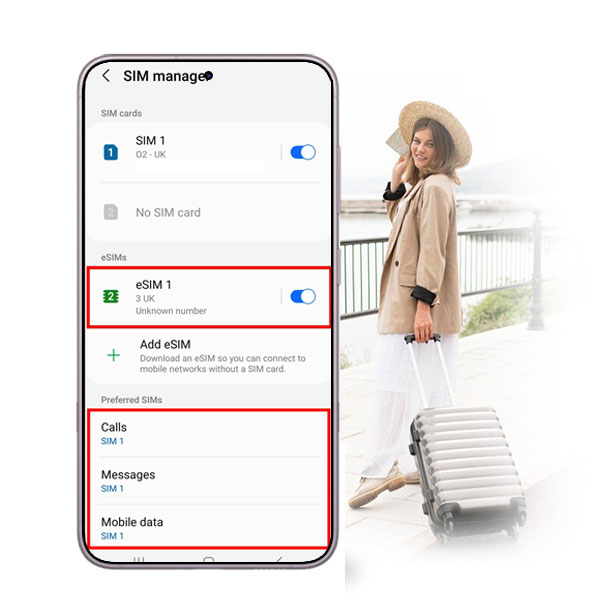
Leave "Calls" and "Messages" set to your original primary SIM.
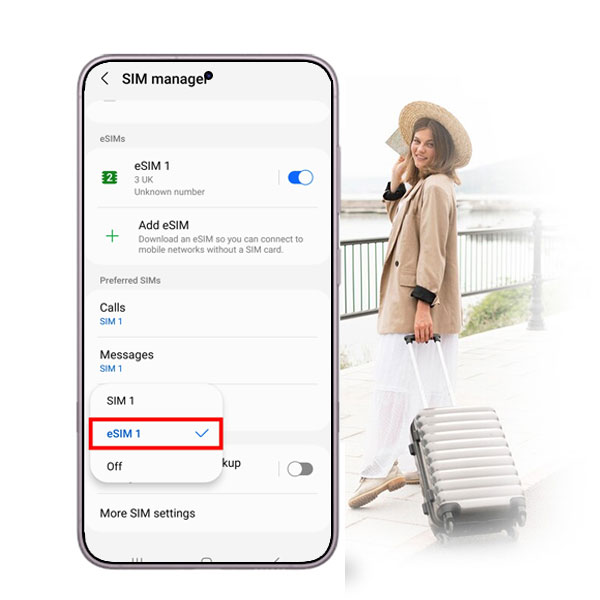
Tap "Mobile Data"
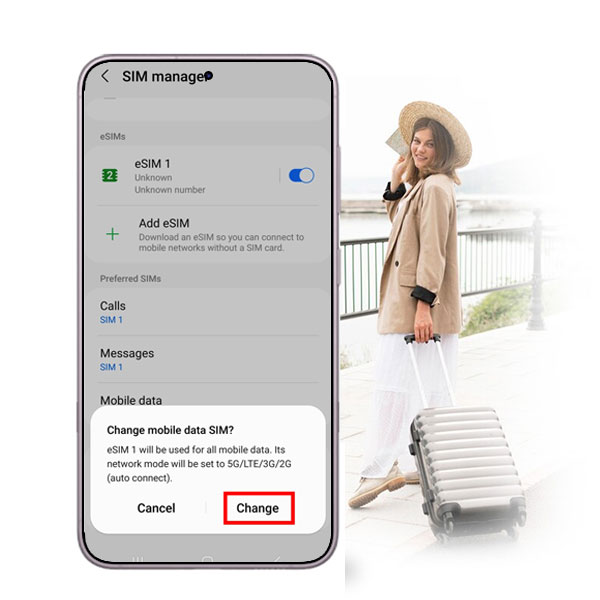
Select the eSIM
Tap "Change".
Ensure Data Roaming is Active
Go to "Settings"
Connections.
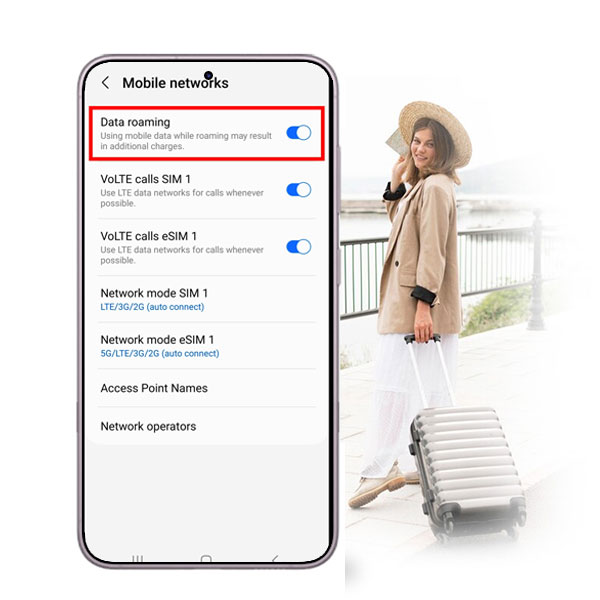
Mobile networks.
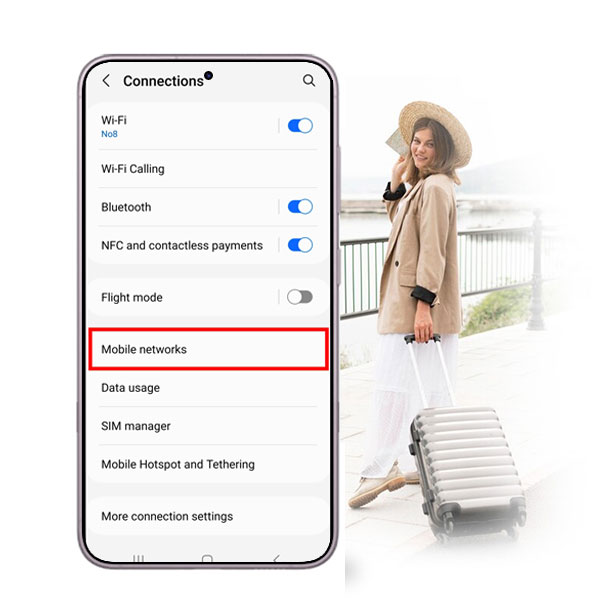
Ensure "Data roaming" is turned on.